I've seen this questions pop up from time to time, "How do I get the responses to an Office 365 Form automatically emailed out to other individuals besides me?"
The answer is Flow, which is available in your Office 365 waffle.
Here is a quick rundown on how to set that up.
The answer is Flow, which is available in your Office 365 waffle.
Here is a quick rundown on how to set that up.
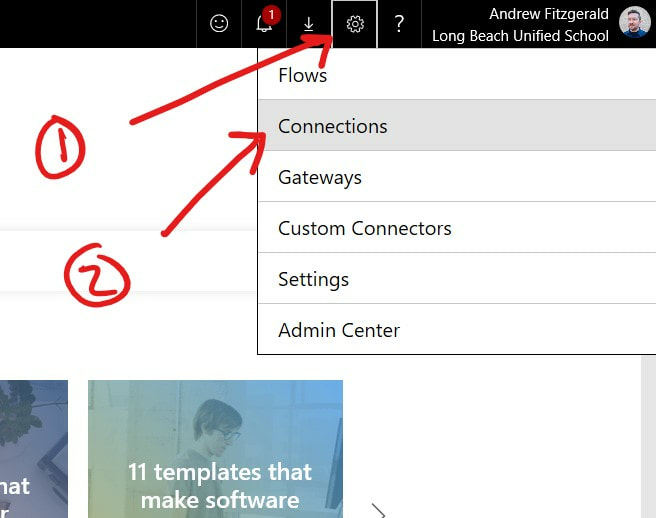
After navigating to Flow in Office 365, you need to set up your connections to other Office 365 services. For this example, you'll need to set up 3 new connections
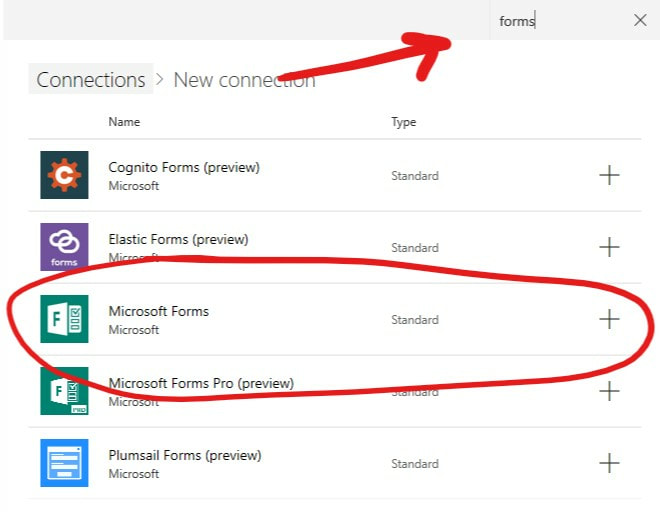
Forms Connection: This will allow Flow to keep an eye on a Form for new responses, and to also get the details of the response
Office 365 Users Connection: This allows Office 365 to use the Flow responder's email address to run a search for the responder's name. *Note: This is only used when the Form is not set up for anonymity. In other words, your Form is capturing who is filling out the Form because the responders have to be logged into Office 365 to fill it out.
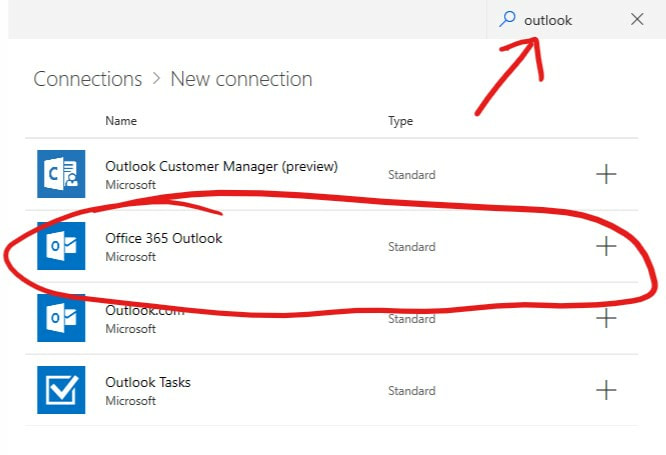
Office 365 Outlook Connection: This allows Flow to create and send the email filled with the Form response details
After clicking the "New Connection" button, the fastest way to find the services you want to connect to is to search for them. Do a search for "Forms", and then click on the + symbol to the right of the Forms service. You'll be asked to login with your 365 credentials.
Do the same for Office 365Users and Office 365 Outlook

Next you need to create a new Flow. Ignore the templates and just select "create from blank".
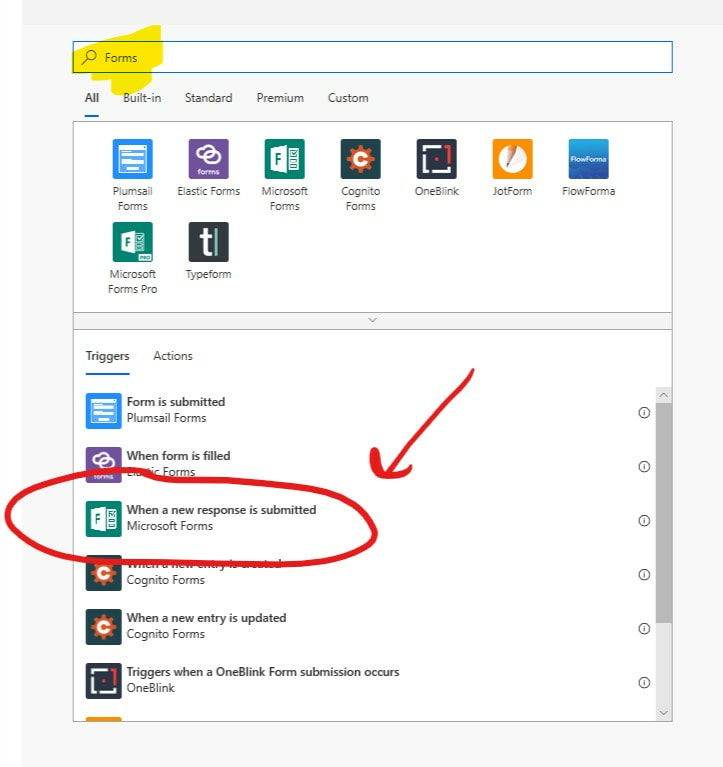
Here we go! The first screen you'll see has all the available actions and triggers in the Flow library. The first step you'll create is the Action. You're gonna tell Flow that when a specific Action in Office 365 occurs, start the Flow process. In this case our Action is when a new Form response is submitted.
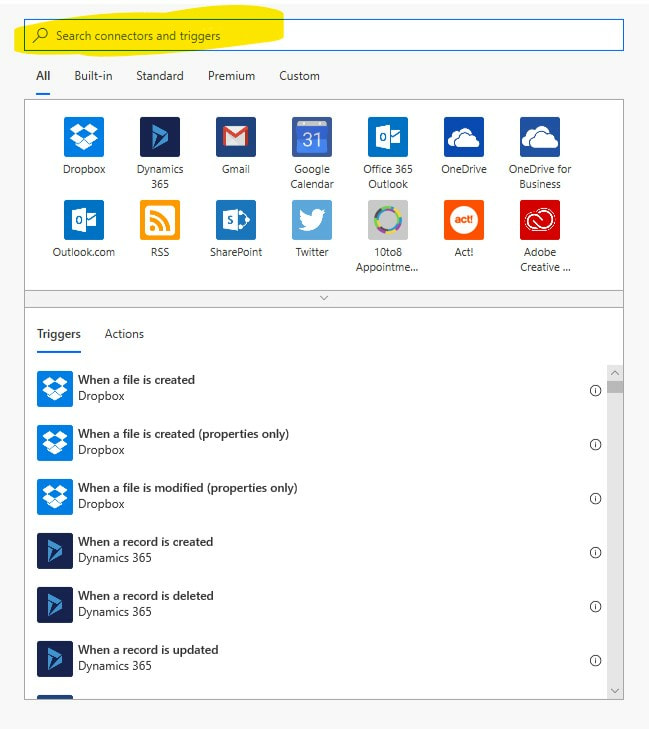
Do a search for "Forms" and select the "When a new response is submitted" trigger.
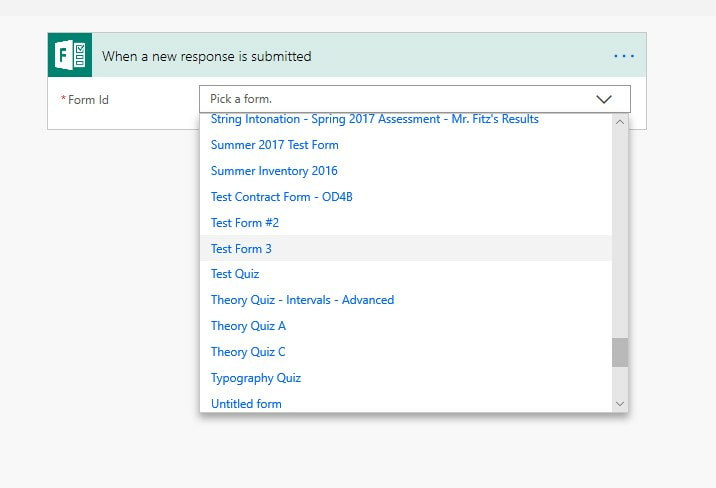
Scroll through your Forms and select the Form you want to get your responses from.
Now you need start creating Actions that will occur based on this Trigger event. Click the + sign and run another search for "Forms". Select the "Get Response Details" action.
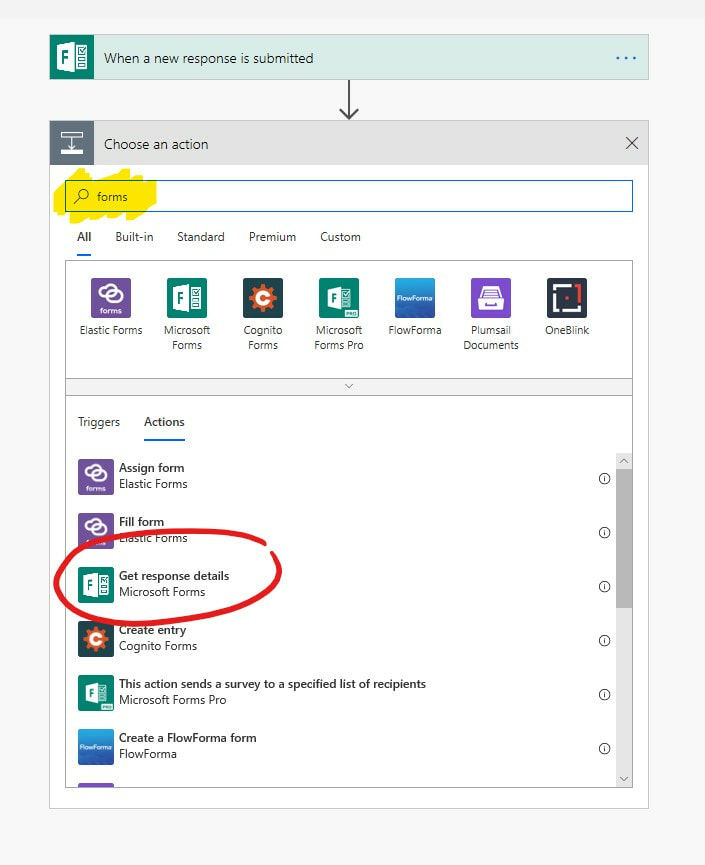
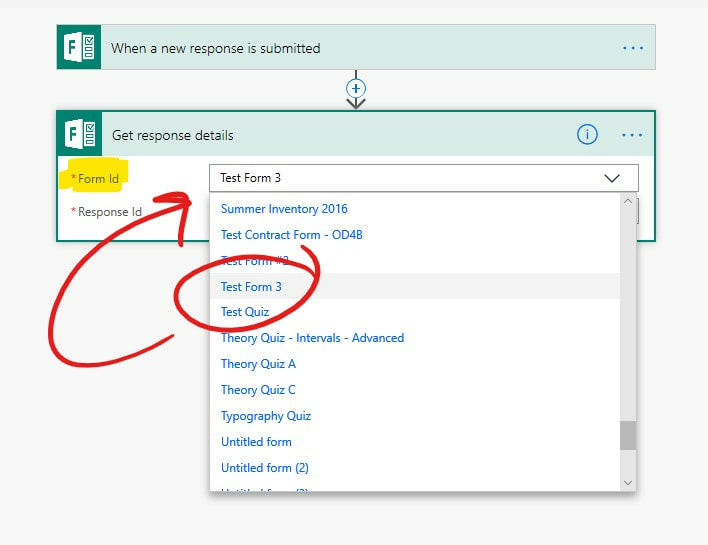
In this action, select the same Form from your list. This action will get the details from a response after the Flow's trigger gets activated.
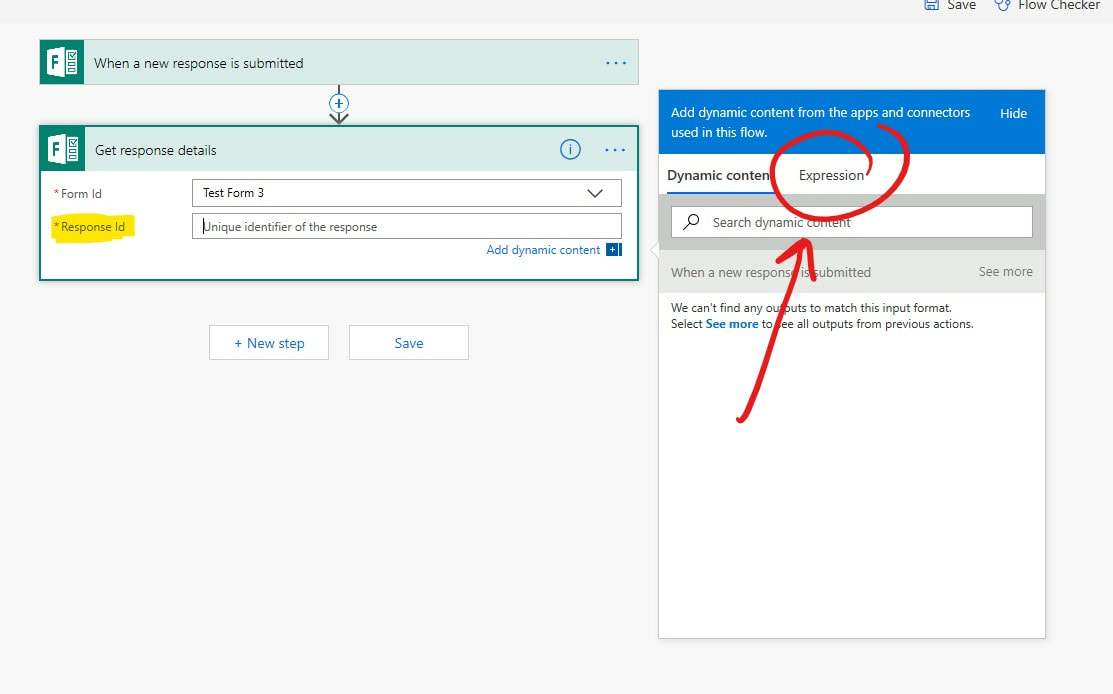
This part isn't as tricky as it looks. You want to get the details from the latest Form submission, so you need to tell Flow to get the latest submission. After clicking in the Response Id box, a little helper called Dynamic Content will pop up on the right. You'll use Dynamic Content a little later, but for this case we need to create an expression. Click the on the Expression Label.
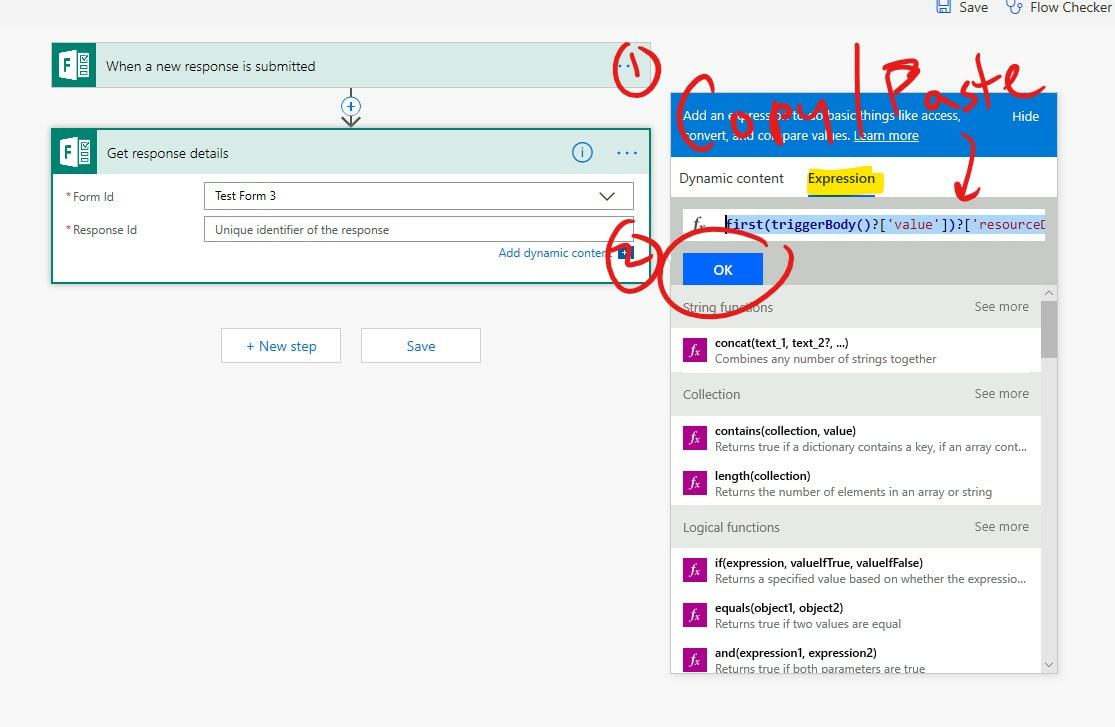
In the function(fx) box, copy paste this text string into it
first(triggerBody()?['value'])?['resourceData']?['responseId']
This function tells Flow to get only the details from the latest Form submission. Click the OK button, and you'll see a magenta fx box appear in the Response Id text box
first(triggerBody()?['value'])?['resourceData']?['responseId']
This function tells Flow to get only the details from the latest Form submission. Click the OK button, and you'll see a magenta fx box appear in the Response Id text box
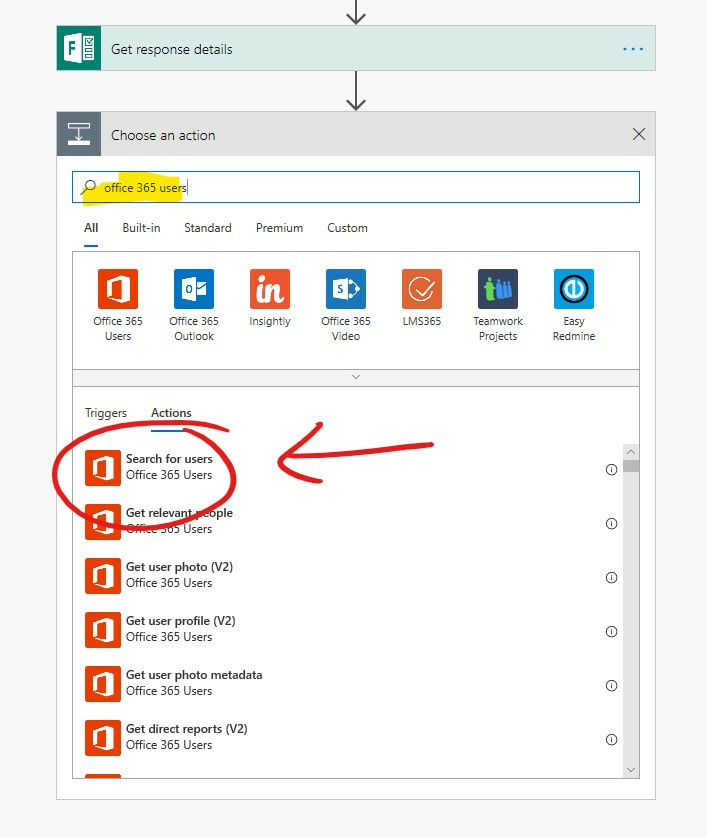
At this point Flow has grabbed the details of the latest Form response, but now you need to get the Responder's name because it's not included in the details. For this step you'll use the Office 365 Users service. Click the + button and search for "Office 365 Users" and select the "Search for users" action.
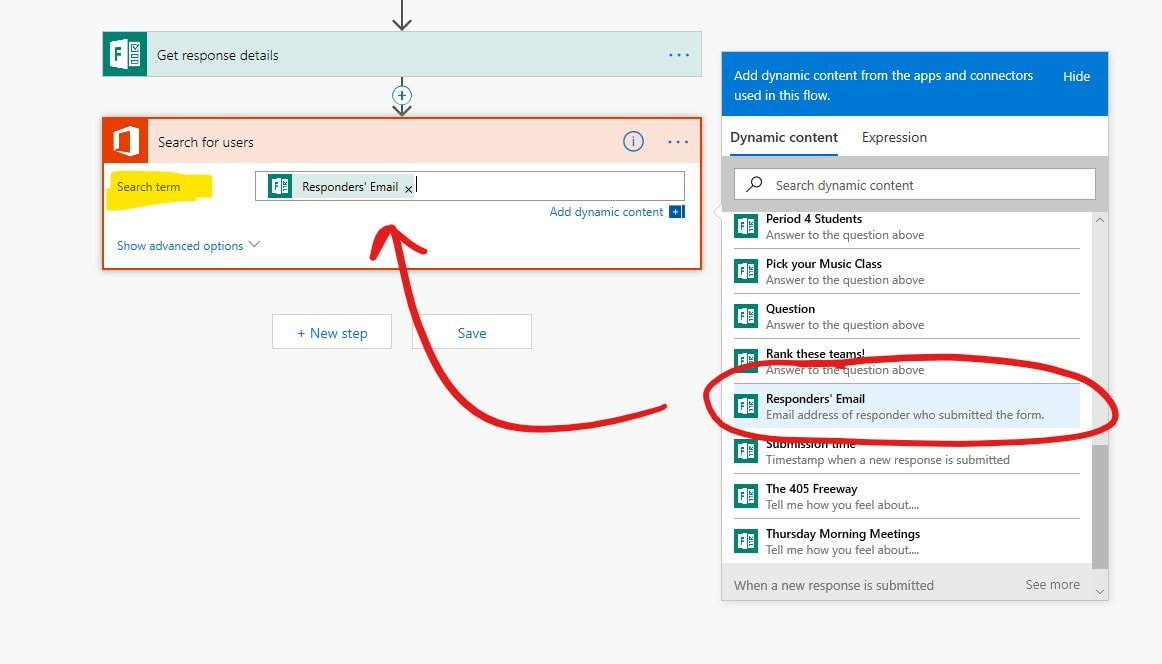
In the search item box, you're gonna put in some Dynamic Content. When you click into the search item field, the Dynamic Content helper will appear. Scroll through the list of available options and select "Responder's Email". This is the email address of the person that filled out your Form (the latest submission).
In this step, you're telling Flow to search through the Office 365 directory and match the email address to a person in the directory. Then Flow will have access to that person's directory details, including their name.
In this step, you're telling Flow to search through the Office 365 directory and match the email address to a person in the directory. Then Flow will have access to that person's directory details, including their name.
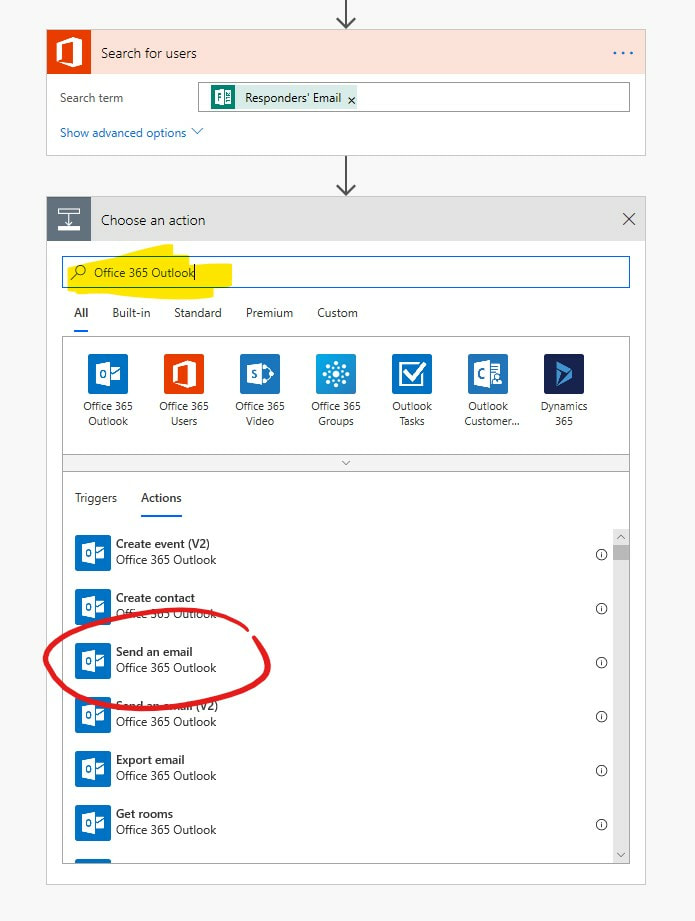
Now you need to start creating your email. Click the + button and run a search for "Office 365 Outlook". Select the action "Send an email".
In this step you're creating an email that will be sent to the people you choose. In the "To" text input field, start typing the names of the people you want the email to go to. Office 365 will run a search and find their email address. Select the email address and their name will propagate to the "To" field. Keep typing to add all the people you want.
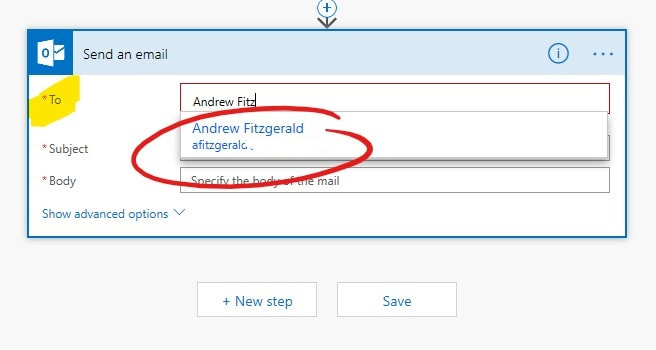
In the subject field, type out the header for this email.
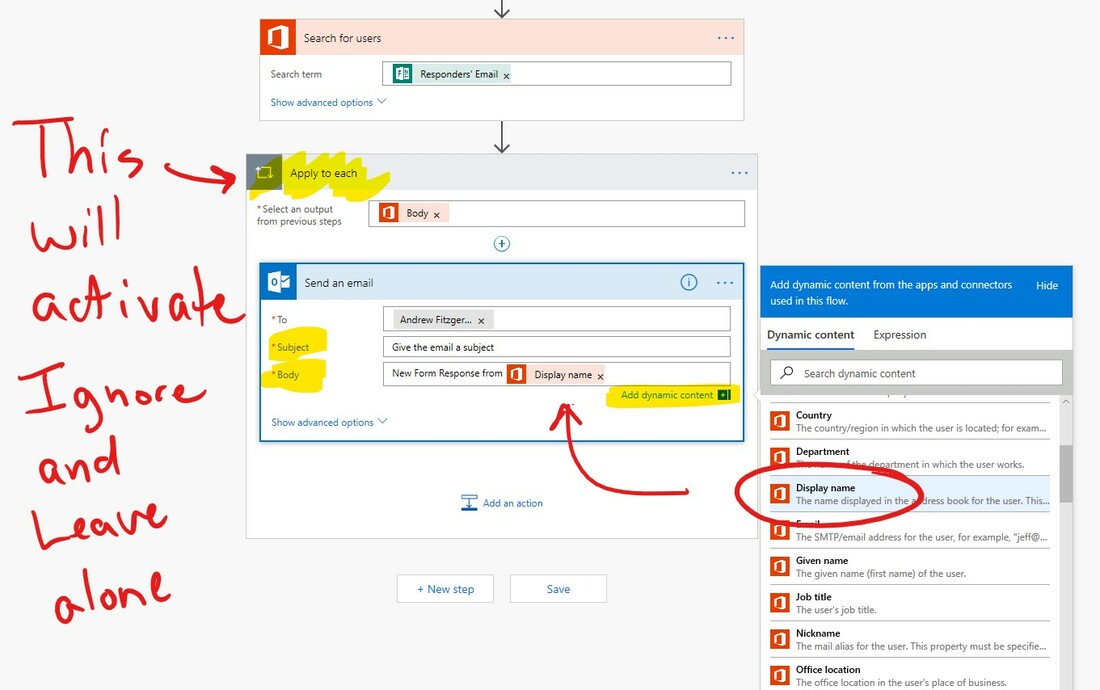
In the Body field, this is where you create your email. You're gonna be typing and adding Dynamic Content. At some point you're probably gonna want to mention the name of the last Form responder. To include their name, scroll the Office 365 User Dynamic Content and select "Display Name". That will input the latest responder's name into your email message.
This will also activate Flow to create a "Apply to each" condition. You can ignore that.
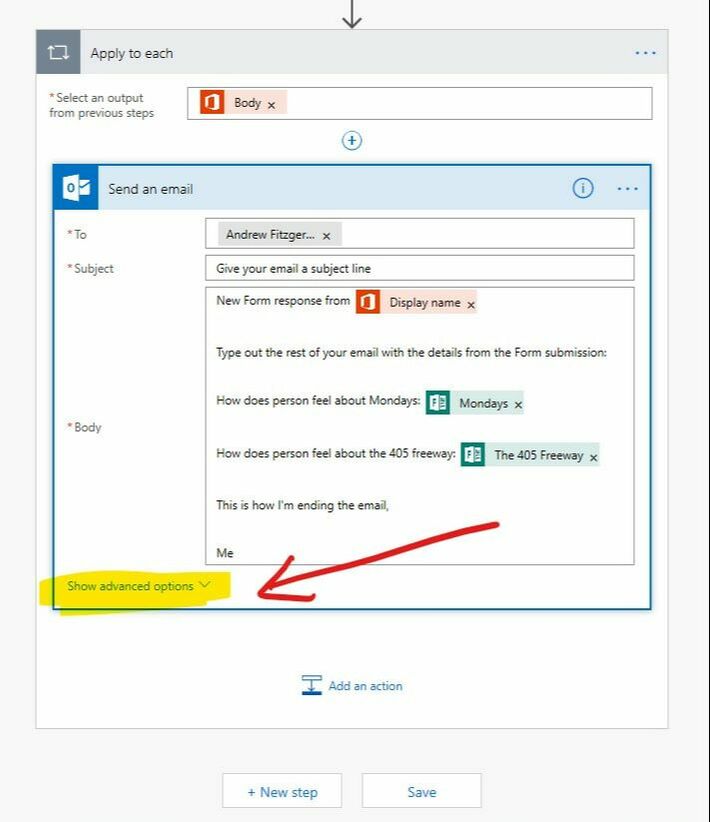
Finish creating your email. You want to include the details from the Form response, so scroll through the Dynamic Content menu and select the items from the Form submission you want to include in your email. When you're ready, click on the advanced option menu at the bottom.
In this area, I like to select "Yes" for the Is HTML option. Just change it to yes. You can also type into the "From" text field if you want the email to say it was from someone in particular.

And that's it. Give your Flow a name, click save, and if you're ready, go fill out the Form to test it out.
 RSS Feed
